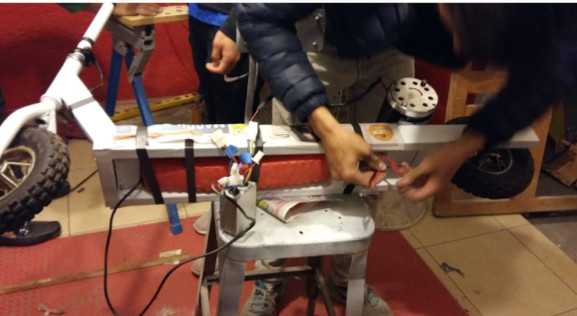
DIY 18650 Li-ion Battery
2019-01-09
DIY 36V Battery Pack with re-purposed 18650 Li-ion batteries
Technologies used:
- Li-Ion
- BMS
- Spot welding
Introduction
For a school project we had to design and build from scratch an electric scooter, that was capable of carrying a person of around 100 Kg (220 lb) at a speed of around 20 km/h (12 mph). One of the hardest parts of building any type of electric vehicle is obtaining a battery that fits your build while also being powerful enough to propel the vehicle at a reasonable speed, in today's market you have a lot of options when it comes to battery chemistry, in our case we decided to use Lithium-ion technology since they provide the best size to energy ratio, the most common form factor for Li-ion cells is the 18650 named after the diameter (18 mm) and the height (650 mm) of the battery.
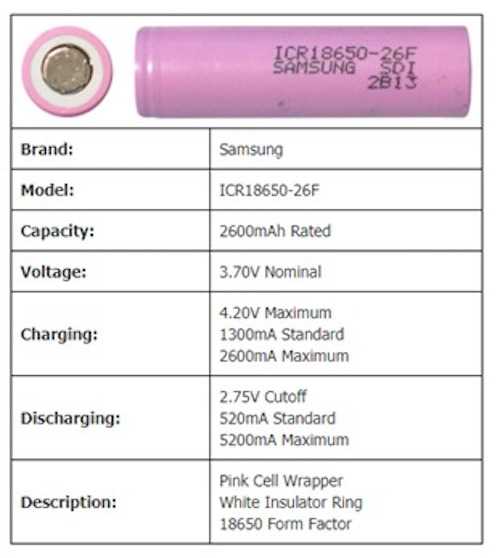
Below are the characteristics of a Lithium-ion 18650 cell made by Samsung.
A word on recycling 18650 cells
If you search online you can find Samsung or LG cells with a capacity of 2.6-3 Ah for around $5 USD each, however a very cheap way to get a hold of cells is to recycle them from used laptop batteries, normally a "broken" laptop battery has around 6-8 18650 cells of which some of them are not functional due to wearing, but others still hold a charge perfectly which means we can reuse them.
For our project we calculated that we would need around 40-50 cells, so we decided to buy them from a guy that recycles them for around 1 USD each which saved a lot of cost in our project.
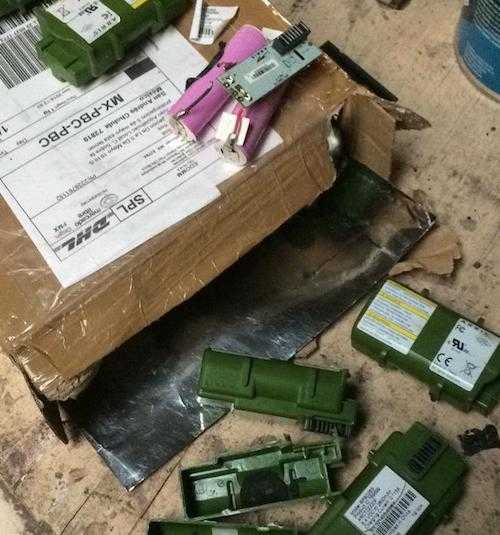
Below you can see a picture of how we received them, with the laptop battery package still on them.
Since the batteries that we used were not new and had different capacities due to wearing we had to test the capacity of each cell individually, for that we used a battery balance charger such as the popular Imax-B6 which we used to perform a discharge and charge test at 1A that yielded the capacity of the battery.
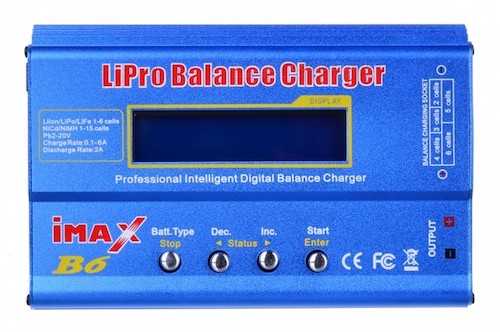
After testing the capacity of each cell we separated them into similar capacities groups for later use, most of our good cells had an average of 2400mAh out of the 2600mAh they are rated for, which is around 90% of original capacity.
When storing Li-ion batteries you want to make sure that they're voltage is around 3.7v, otherwise they might go bad. The Imax-B6 has a feature which you can use to charge or discharge the battery in order to take it to the safe storage voltage.
Parallel and Series Connections
The battery pack is made for an electric scooter that features a 36V 500W DC Motor, this motor will demand from the battery around 15A of power.
To make a battery pack that has the voltage required and that can handle the high current draw we need to make arrangements of batteries in series and parallel.
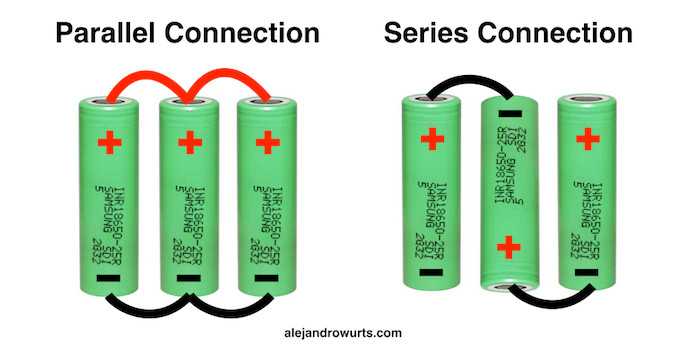
To tackle a higher voltage we use series connections between the batteries, in which the final voltage is equal to the nominal voltage of the battery (3.7v) times the number of series connections.
In our case we used 10 cells in series which yields V = 3.7v x 10 = 37v.
In order to handle the large current we need to look at the maximum discharge rate of each cell, in our case that is 2C which means that given our capacity of 2.6 Ah we can discharge up to 5.2 A per cell without damaging them.
If we used a configuration of 10 series with no parallel connections we would have a 37v battery that can provide up to around 5A which for our use is not enough since the motor draws around 15A, to solve this problem in addition to series connections we use parallel connections which add to the capacity of the battery the final capacity is equal to the capacity of each cell times the number of parallel connections.
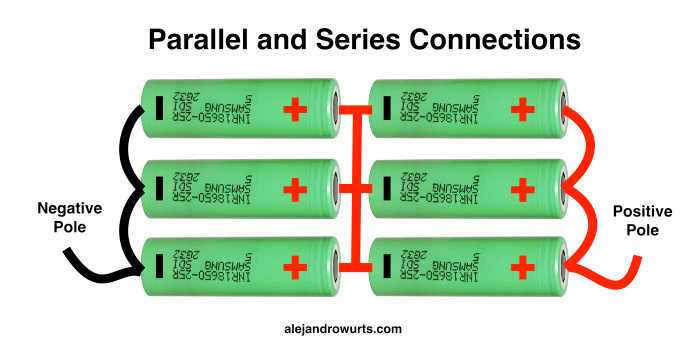
At the end for our battery pack we ended up using 40 cells in a 10s4p setup which gives a nominal voltage of 37v and a capacity of around 9.6Ah, this setup allows for a maximum current draw of around 19A.
Battery Managment System (BMS)
To protect and charge the batteries, a BMS (Battery Management Systems) was used, a BMS ensures that when you are charging or discharging the battery the balance of each parallel group of batteries stays the same, this helps to prolong the life of the cells as well as preventing over-discharge or over-charge of the cells.
Some essential functions of the BMS are:
- Disconnect or turn off the load when the voltage of a battery cell falls below 2.5V.
- Stop the charging process when the voltage of a battery cell rises above 4.2V.
- Turn off the system each time the temperature of a cell exceeds 50° C.
- Avoid under-voltage (over-discharge) in the cells by disconnecting the load when necessary.
- Avoid over-voltage (over-charge) in the cells by reducing the load current or stopping the charging process.
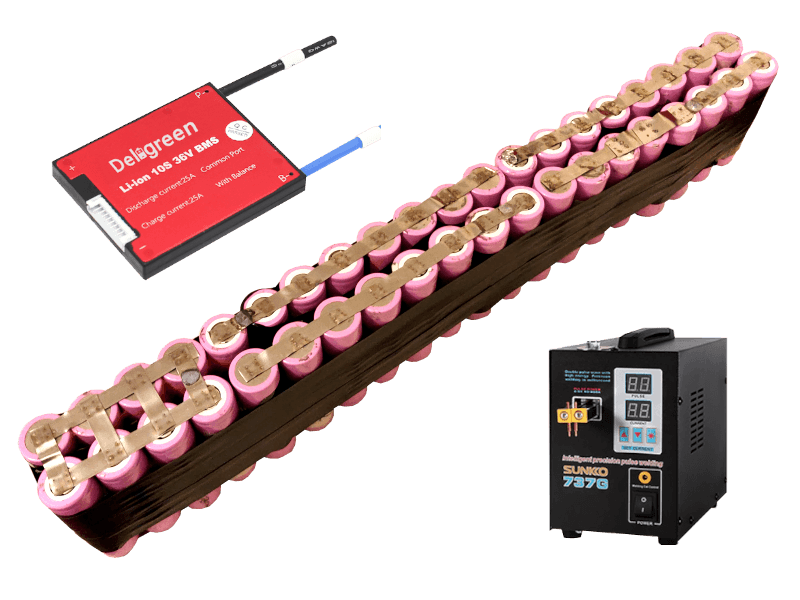
When searching for a suitable BMS for your battery pack the characteristics you need to search for are that it matches the number of series connections and that it can handle more than the current you will need to provide to the load, in our case that is a 10S 50A BMS that we obtained from Aliexpress from the seller Deligreen.
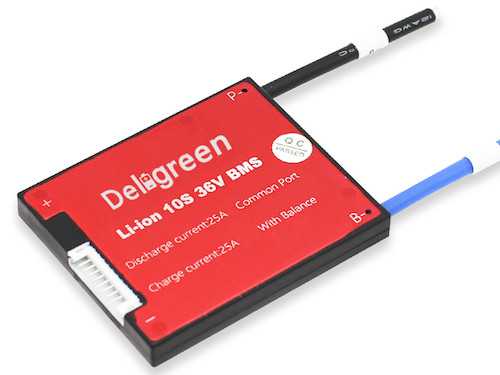
Most BMS should connect similarly, but when in doubt always contact the manufacturer, the connection diagram that we got from them is the next one.
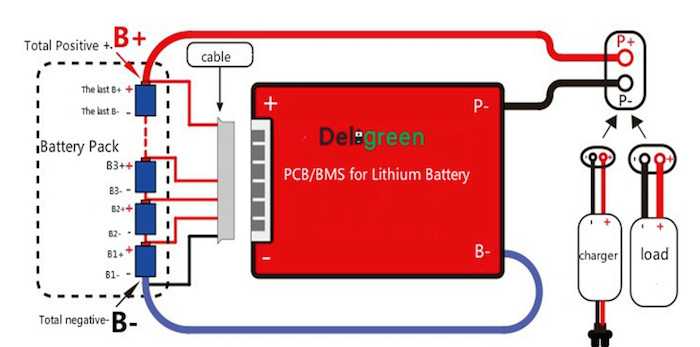
The balance connector of the BMS has several wires that correspond to the number of series connection, these wires need to be connected to the parallel groups of the battery pack as in the picture above in order for the BMS to be able to monitor the battery properly.
Construction of the battery
When it comes to the construction of the battery pack there are two major ways you can go about it when it comes to connecting the individual cells together, using a soldering iron or using a spot welder.
Soldering with a conventional soldering iron is a cheap way of connecting them but the cells end up suffering due to the continues heat that is applied to them, degradation of the cell can be lowered by using a higher wattage iron that can heat the connection quicker and does the battery receive heat for a lower time.
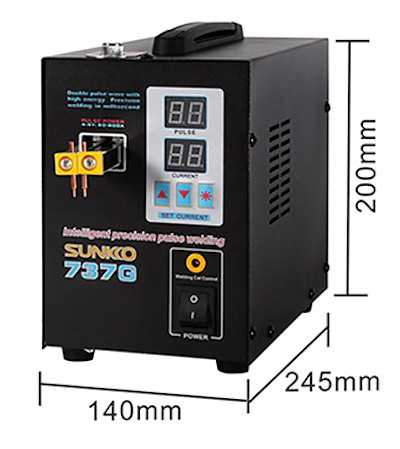
The second option is to use a spot welder together with nickel strips to make the connections, this method tends to be better on the cells since the heat that welding produces is only seen by the cell for a very short time. We decided to use spot welding since we could borrow a spot welder, but you can also buy one online for around $60 USD, the type of spot welder we used can be seen below.
The nickel strips that we used came in a roll and are .1mm thick and 8mm wide.

After getting the appropiate materials and tools we continued to weld all the battery cell according to the parallel and series groups.

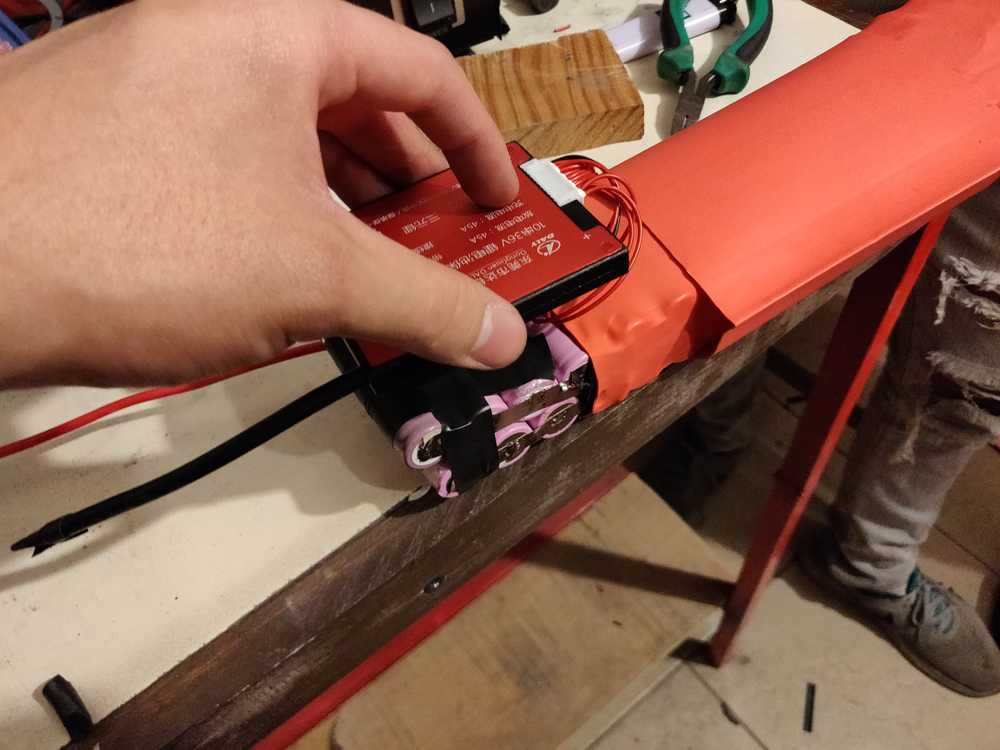
In the next picture you can see the battery pack partially covered with heat-shrink wrap which makes the battery safer to handle, previously we had connected the 10 wires of the balance connector to each parallel group of the battery pack after which they get pluged into the BMS as you can see in the picture, all connections were made according to the manufacturer specification.
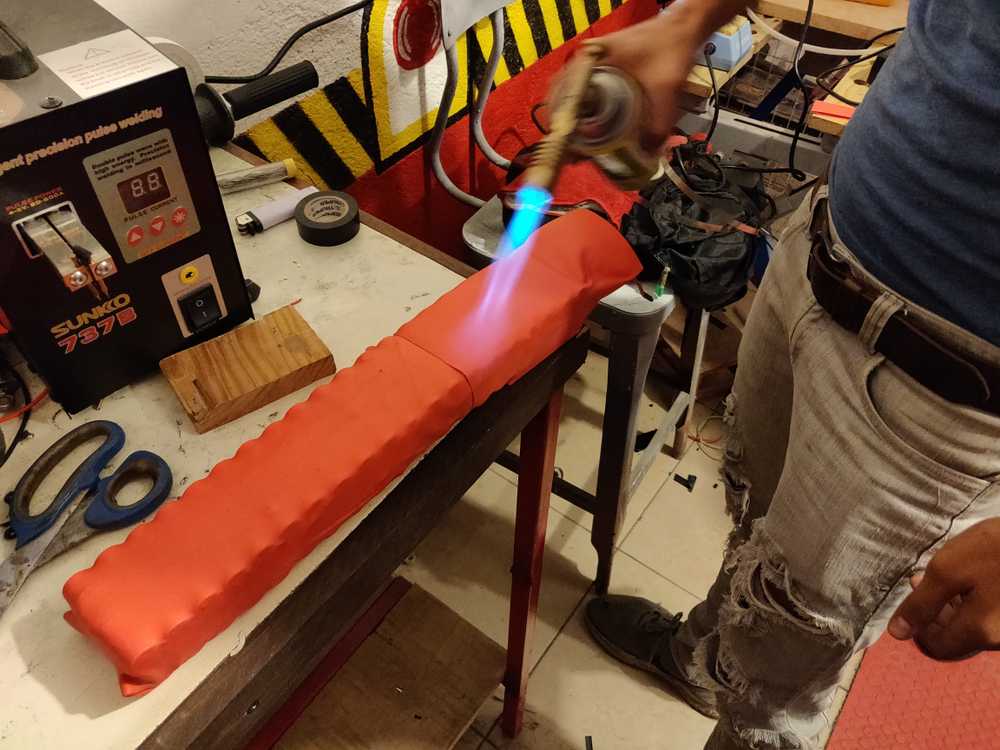
After we made all the connections to the BMS we added more shrink-wrap and tighten everything down using a blow torch.
The final product is a high amperage battery pack that its made to fit inside the body of our electric scooter like you can see in the picture below.
